Fractured Newbie Guide
-
Updated to Release
Hey all,
Seeing all the questions appear in global and help chat, I felt like updating guide I made some 4 years ago in hopes to allow players to understand the basics of the current game.
If you feel like I am missing something essential or something seems unclear, please comment below.
General TIP: The tutorial is a great way to learn about the mechanics in Fractured. It does not explain everything but will get you started. Please finish the tutorial!
PSA: Imbuing tables in the tutorial or starter towns are not useable
PSA: Bank storage is town specific. You will not be able to access your bank chest from Town A in town B
Contents:
- Tutorial
- General controls
- Health, Mana, Hunger and Rest
- Skills and Abilities
- Rank & Proficiencies
- Crafting
- Building
- Imbuing
- Enchanting
- FAQ
Also avaivable in these languages:
- Перевод на русском (thanks to @muker) - partially outdated
If you make a translation of this guide into other languages, please let me know and I will link them here.
-
Tutorial
General TIP: The tutorial is a great way to learn about the mechanics in Fractured. It does not explain everything but will get you started. You will also be getting some Knowledge Points here that you will not be getting at any later point in the game, making it easier for you to reach rank 50. Please finish the tutorial!
Look out for quest markers as green stars on your mini map. They will guide you to important locations or crafting stations to complete the tutorial.
Some items are much harder to get outside of the tutorial and are useful or sellable. I highly recommend you load up on the following items BEFORE leaving the tutorial world:
- 30 Brain Mushrooms

- 30 White Cap Mushrooms

- 100 Plant Fibers

This is a full walk-through of the Tutorial quests coming up. You can track your quest progress by clicking on the Journey Log in the bottom right

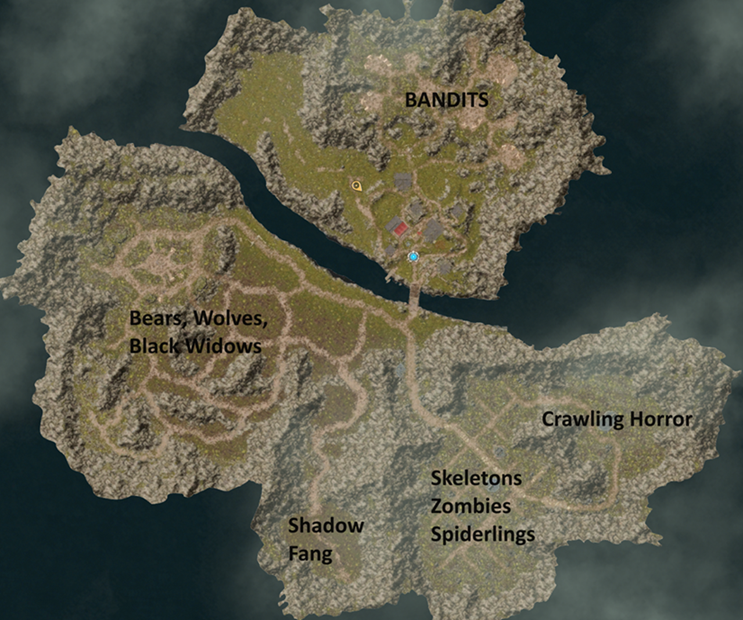
Quest 1: A moment of peace
- Rest at a fireplace
- Add all abilities to preset
- memorize preset
Left-click the fireplace in front of you and select the sitting person. Add abilities and memorize presets
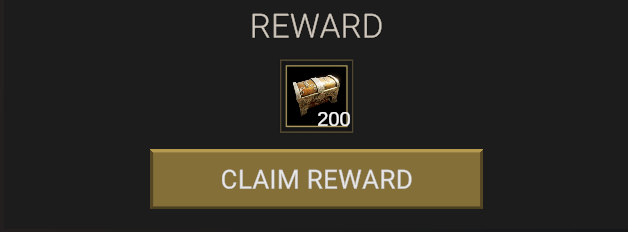
Reward: 200 Knowledge Points (KP)

Once completed. The quest will show a chest symbol indicating a reward is available. You can claim this by selecting the quest in your Journey Log and click on the "Claim reward button"
Quest 2: Healing Provisions
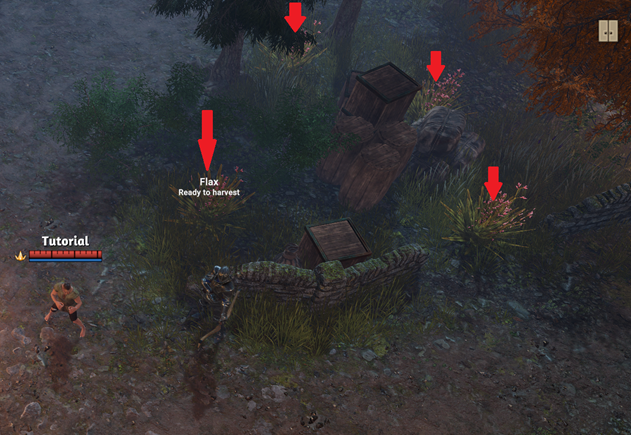
- Gather 6 Plant Fibers
- Craft 6 Linen Weave
- Craft 30 Linen Bandages
Gather plant fibers from flax plants. You will find those all over the tutorial area like in the picture above. Craft linen weave through regular crafting means, then select the consumables tab inside the crafting menu and turn your linen weave into bandages.
To use them, you can click and drag them onto your hotkeys. Bandages will heal you for a reasonable amount and remain a good healing method throughout the game.Reward: 200KP, 100 bandages
Quest 3: The best defense
- Craft role specific weapon
- Craft shield
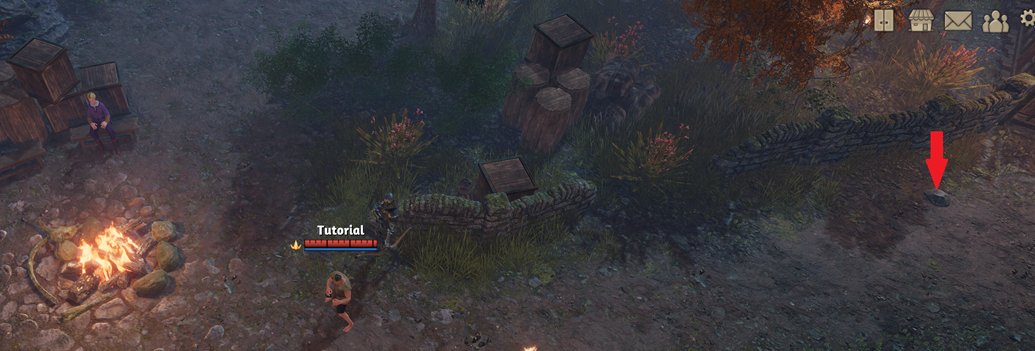
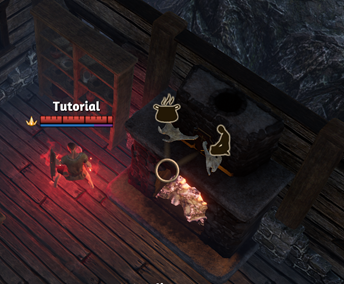
Check your crafting menu (Hotkey: N) for what materials are required to make your needed items. You can gather branches from trees and small stones (red arrow) from the ground. Rope can be made from plant fibers in your crafting menu. Open your inventory (Hotkey: i) and right-click your freshly made weapon to equip it. All equipped items can be viewed in your character sheet (Hotkey: C).
Reward: 200KP
Quest 4: Hunting for supplies
- Gather 20 Raw Animal Hides
- Gather 5 Raw Wolf Meat
- Gather 5 Raw Bear Meat
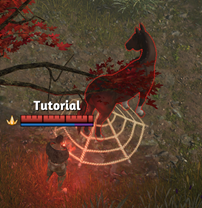
Now that you have a weapon at hand, head to the south and you will find an area with plenty wolves, bears and black widows. Kill all of them until you get a message "Creature Knowledge Complete". You will want to complete all creature knowledge in the tutorial area to maximize your KP gain and gain extra Ranks. Left-click onto corpses on the ground and you will see the loot window appear. Right-Click any item to move it into your inventory. I recommend to pick up anything you find at this time.
You also gain KP from discovering any new plants. Explore around this area and click on all undiscovered trees and plants to gain extra knowledge.Reward: 200 KP
Quest 5: Safe haven
- Reach the village on the other side of the river
- Craft 5 Roasted Wolf Meat
- Craft 5 Roasted Bear Meat
Follow the green star on your mini-map to the new village across the river and head to the fireplace. Select the cauldron symbol and roast your raw meat.
Reward: 200KP
Quest 6: Gear Up
- Craft 20 Animal Hide
- Craft 1 Hide Armor
Follow the green star on your mini map and turn your raw animal hides into animal hide at the fleshing beam, then go to the tailor bench and finish your hide armor. Equip it by right-clicking it in your inventory.
Reward: 200KP. 10 Animal Hide
Quest 7: A fine steed
- Craft 1 Animal Net
- Find the wild horses
- Tame a horse
- Ride a mount
Collect needed plant fibers and turn them into rope, then turn it into animal nets in the consumables category of your crafting window (Hotkey: N). Drag the animal nets onto your hotbar. Follow the green star on your mini map to the horse area and press the hotkey associated with the nets when you mouse-over a horse. This will keep it in place. Left-click the horse and your character will talk to it, then attempt to tame it. There is a reasonable chance to not be successful on your first try. Just left-click it again until you are successful. You may need to use multiple nets. Once tamed, open your inventory and equip the horse token, press “A” to mount.
Reward: 200KP
Quest 8: A warrior’s dawn
- Reach rank 5
- Memorize a spell preset with at least 6 spells
- Memorize a talent preset with at least 8 talent points
It is time to explore the other areas of this tutorial land. Your goal should be to reach 100% knowledge of all creatures. You can check your book of knowledge (Hotkey: B). You do not gain additional KP for creatures killed that you already completed knowledge for.
As you are working on reaching rank 5, you can do the quests below simultaneously.Reward: 200KP, 20 gold
Beastmaster (Optional)
- Complete Knowledge of Wolf
- Complete Knowledge of Bear
- Complete Knowledge of Black Widow
- Kill 1 Night Fang
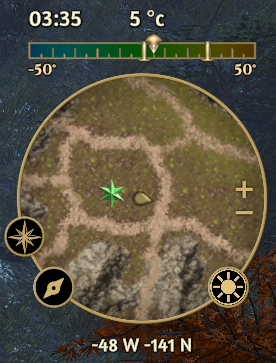
You can find Night Fang in the bottom center as indicated on the map at the start of this section. Valiant Divine Rewards can be opened by right-clicking them in your inventory. They have a tiny chance of turning into very valuable Orbs. Most likely you will get gold from them though.
Reward: 1 Valiant Divine Reward
Undead Slayer (Optional)
- Complete Knowledge of Spiderling
- Complete Knowledge of Zombie
- Complete Knowledge of Skeletal Archer
- Complete Knowledge of Skeletal Mage
- Kill 1 Crawling Horror
You can find all undead in the bottom right part of the map. You can also find the crawling horror location on the map at the start of this section.
Make sure to look out for Brian Mushrooms when you are there. These are nice reagents for later.Reward: 1 Valiant Divine Reward
Bounty Hunter (Optional)
*Complete Knowledge of Bandit Archer
*Complete Knowledge of Bandit Marauder
*Complete Knowledge of Bandit Executioner
*Complete Knowledge of Bandit Oppressor
*Complete Knowledge of Bandit SorcererBandits can be found north of the village in the hills.
Reward: 1 Valiant Divine Reward
Fully Equipped
*Wear a full set of armorGo to town and craft more armor items of the same group. Hide armor, cloth armor and equip helmet, chest, gloves and pants of the same group.
Reward: 200KP
A touch of magic
- Enchant a piece of armor to +1 or more
- Enchant a weapon to +1 or more
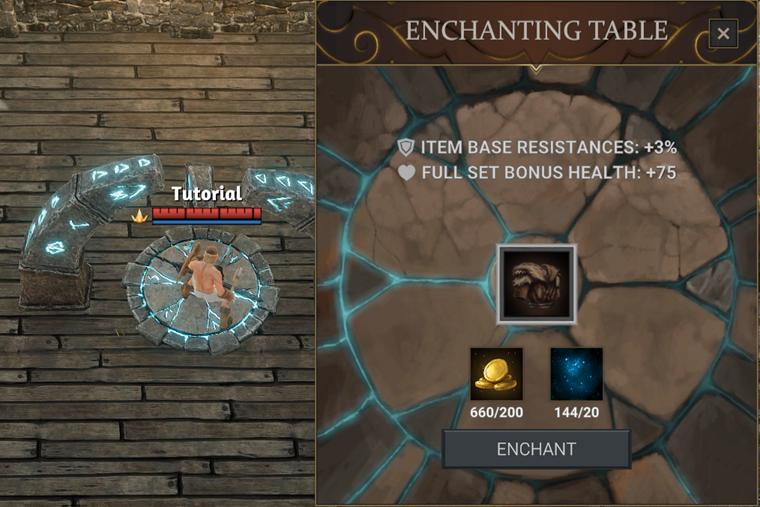
After completing your bandit knowledge, you should have gathered enough gold to go to the enchanting table. Drag any armor piece (chest recommended) into the slot of the table. Only items in your inventory can be dragged there. You need to unequip it first if you are currently wearing it.
Click "Enchant". The first enchantment upgrade costs 200g and 20 Primal Energy Residue. Repeat the same with the weapon of your choice.If you are short gold, go back to the bandits.
Reward: 400KP, 50 Primal Energy Dust
The adventure begins
*Use the portal to leave the tutorial regionMake sure you have all other quests and creature knowledge completed. Then head to the green star on your mini map and click on the portal. This will teleport you into the regular player worlds. There is no going back.
You have the choice between Terra and Syndesia. Both worlds have different biomes, creatures and materials. You will always be able to travel between worlds by using a stargate. These require some materials to open, but you can use those opened by others. Players often announce when they open stargate in General Chat.
Congratulations! You successfully finished the tutorial and are ready to explore the vast worlds of Fractured!
Reward: none
- 30 Brain Mushrooms
-
General Controls
Movement
Fractured offers 2 options for moving:- 1 Left click anywhere on the ground and your character will move to the selected spot automatically
- 2.Left click and hold and your character will follow your mouse until you release the button
Attacking
You can attack enemies in 3 ways:- 1.Left-click an enemy and your character walk into range and perform a basic weapon attack
- 2.Right-click an enemy and your character will perform a basic weapon attack without moving
- 3.Using abilities by pressing the corresponding hotkeys.
Trading
In order to trade with another player, simply drag and drop ANY item onto their character model in the world and they will receive a trade request. Once accepted a new window will pop-up allowing you to drag items you want to trade into. Once the deal is accepted by both parties, items will change owners.
TIP: Do not use any valuable items to initiate trade. The item destroy and trade accept buttons overlay and you might by accident destroy your itemsImportant Hotkeys
N = Crafting
X = Social/Party
B = Book of Knowledge
V = Skills and Abilities
M = Map
L = Journey Log
I = Inventory
C = Character sheet
-
Health, Mana, Hunger and Rest
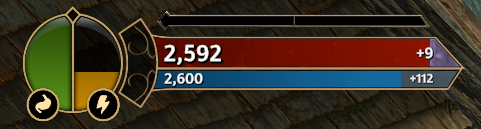
Red Bar: This is your Health. Any damage taken will deplete this. If this reaches 0, you will be knocked down and automatically recover in the same location after 30 seconds. Every time you get knocked down; you will lose some maximum health displayed on the right side of your health bar and item durability, causing it to break eventually. Resting at a big campfire inside town or a player house will remove this maximum health penalty. Small campfires you can place in the wild do not work for this.
Blue Bar: This is your Mana. It is used by various skills and spells. There is no penalty for having 0 mana besides not being able to use some or all your skills. Permanent skill effects such as auras or magic shields will reserve mana from your pool for as long as they are activated. The reserved mana pool is displayed by a purple bar on the right side of your mana bar.
All these bars replenish over time depending on your regeneration rates shown as a +Number inside your bars. You can alternatively check your character sheet (Hotkey: C).
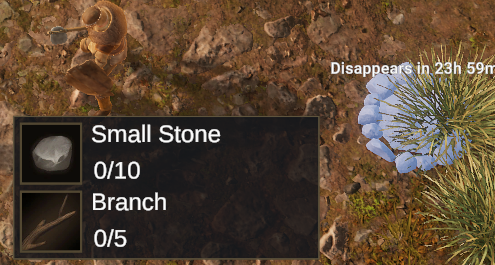
You can also replenish these quickly by sitting down (Hotkey: K) out of combat or completely by resting at any campfireTIP: For better survival, always gather up to 10 small stones and carry them with you. It is easy to find 5 branches anywhere and you can build a campfire (10 small stones, 5 branches) when you really need it!
The stomach like symbol in the circle’s left indicates your hunger. It drains over time and can be replenished by…well, consuming food! If this reaches 0, your health will drain and cause you to KO eventually. Right-click any food item in your inventory to consume it. Raw meat needs to be cooked at a fireplace before consuming it.
Right of our hunger indicator, the lightning symbol is our Rest indicator. This also drains automatically over time and can easily be replenished by resting at a campfire or fireplace. You can also recover Rest by using certain potions or teas.
If it reaches 0, you will become exhausted and walk very slowly.
-
Skills and Abilities
Every character starts with 4 Skills based upon your selected class during character creation.
Adding Skills and Abilities to your Hotkeys
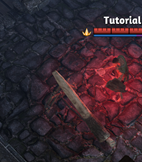
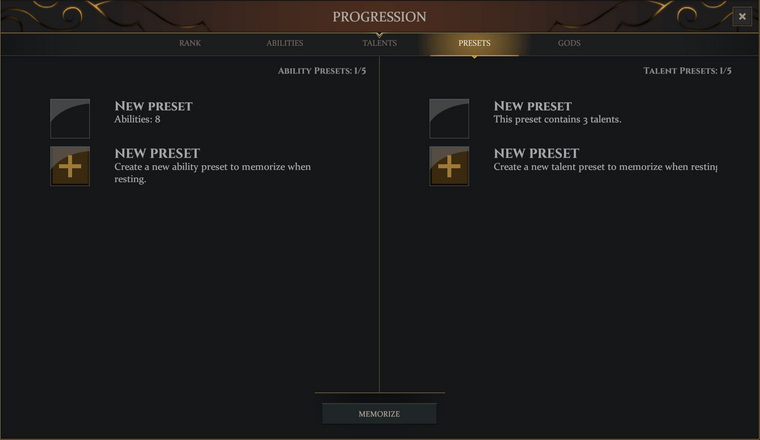
To be able to use your skills, you need to bind them to your hotkeys. To do so, move to a campfire or fireplace and rest there. A screen will pop up like the one above. Select “New Preset” with your left mouse button in the ability section on the left .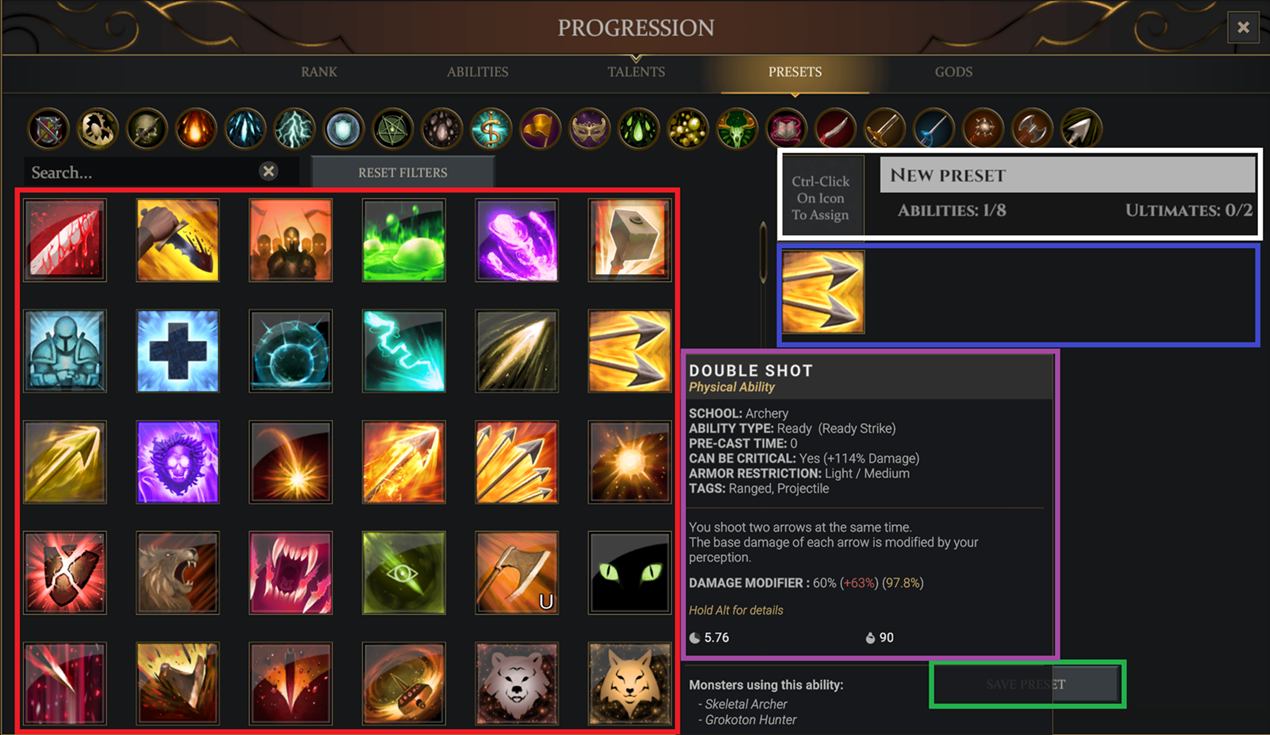
Now you get to configure all the skills you have unlocked (red box) and use them in your current preset by left-clicking it. You will see the skill appearing on the right side (blue box). These will be your active skills you can use in the world. To remove a skill, left-click on it in the active skills area.
You can select up to 8 skills of which a maximum of 2 can be ultimate abilities. Ultimate abilities have a U inside their ability symbol; then name your preset (white box) and hold CTRL and right-click any ability symbol to make this your preset symbol. This helps to quickly differentiate your different presets.
Once finished, click on "Save Preset" (green box).Mouse-over any abilities and you will see the ability description pop-up (purple box). This shows the school, type, cast time, whether it can critically hit, its armor and weapon restrictions, cooldown and mana costs.
This will get you back to the first pop-up window. Select your newly made preset with a left-click and click on “memorize” in the bottom. You will not be able to use your made presets without memorizing them first. That is how you switch freely between different Presets.

Now you will be able to drag and drop skills from your memorized preset (red box) into your hotkey selection (blue box).
Learning New Skills and Abilities
As you fight creatures, you will see new entries in your book of knowledge (Hotkey: J). Select a creature on the list on the left and you will see its stats appearing on the right half. In the bottom of that window you can see grey squares showing new learnable abilities (red box). You uncover which skills you will be able to learn from that specific creature after you killed enough creatures of the that type and reach 20% or more knowledge (green box). NOTE: Some creatures offer no new skills or abilities. Some offer multiple. You will discover additional skills for every 20% knowledge. Very few creatures require more than 20% to discover the first skill.
Then follow the steps from the previous section to add new skills to your preset and memorize it.
-
Rank & Proficiencies - Update in Progress
-
Crafting
You can open the crafting menu by pressing “N” or by interacting with a crafting station. All crafting menus have the same structure.
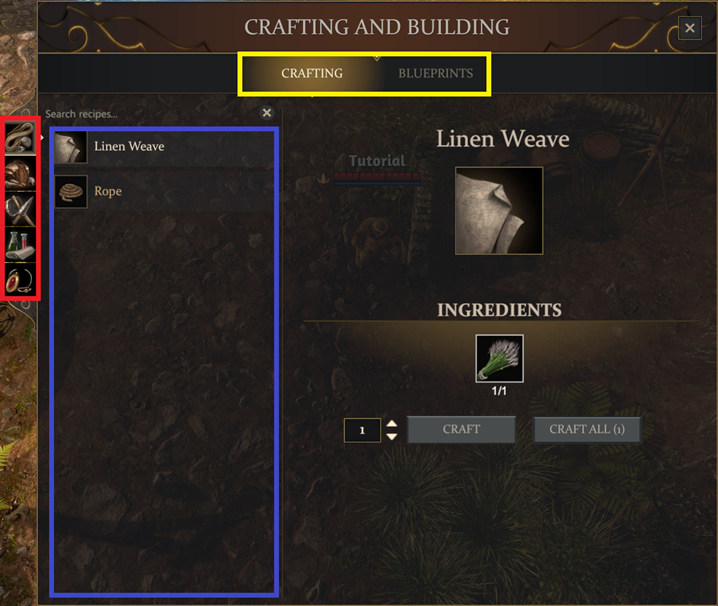
You have the crafting categories (red box) and recipe list (blue box). Available crafts are dependent on the crafting station used.
To craft a specific item, select it in the list, then adjust the wanted quantity and click on craft. You can alternatively just click “craft all” to craft the highest possible quantity of that item based on the ingredient quantities you have.
Most crafted items can be made in different qualities: Poor, normal, good or excellent. Chances for higher quality results are dependent on your crafting experience with that specific item.
Each craft will give you crafting experience towards the next rank for that specific craft. Crafting inside the tutorial will not grant you experience. Anyone can make primitive (tier 1) gear. To make tier 2 items (e.g Energy Staff), you need to become an adept in its tier 1 version (e.g. Primitive Mage Staff).
Higher quality has slightly better attributes and more importantly only items of normal or better quality and non-primitive items can be repaired at the workstations they can be crafted at.
-
Building
To build a house, you need the following:
- own a plot of land
- place a house blueprint
- own a hammer and axe
- gather all materials and complete each building segment
First of all, you will need to gather 2000 gold pieces. You can find those as loot on multiple creatures, primarily humans and humanoid creatures, in lockboxes or as trial rewards.
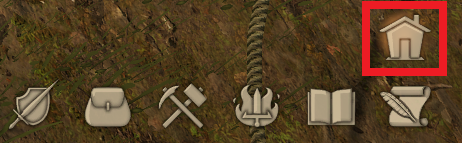
Then find an open plot of land. This is indicated by a grey square on your world and mini map and as a roped-off construction site on the actual world. All house plots are 4x4 in the world, except for guild cities. Maximum size in guild cities is 5x5 and only a few of those will exist in the world. Move into the construction site, select the parcel management window and pay the 2000g to take possession of the land. Open your blueprints (Hotkey: N) then select the "Blueprint" tab in the top, select the desired type of building and place it with right-click on your plot of land.
As of the current release version, I recommend placing a 3x3 no patio blueprint. This will allow you to place more or less all crafting stations you might want.
You will now be able to mouse-over any part of the house and see what materials are required to finish each segment of the building. Stone can be gathered from stone nodes (requires a hammer) and wood from trees (requires an axe). Your character can only transport one piece of material at a time.
Building a handcart makes a builder’s life much easier. To do so, open the blueprint menu (Hotkey: B), select the handcart and place it with right-click. Mouse over to see the needed materials, gather those, transport them to the cart, and add them to the cart by left clicking on it with the material in your hands. Congratulation! You can now transport 12 building materials at a time by adding them to the built handcart just like you did before when you were building it. A handcart can only transport wood and stone blocks.
You can add materials to your building site just like you did with the cart: Hold the material in your hand and left click on the building segment you wish to add the material to.
After completing your house blueprint, you can add blueprints for furniture and craft stations as you like in the same fashion.
You will need to pay an upkeep of 2000 gold per week unless you have VIP activated.
-
Imbuing
Imbuing can be done at any Imbuing table that you have built or been given access to. It DOES NOT WORK at the public one in the starter or tutorial towns!
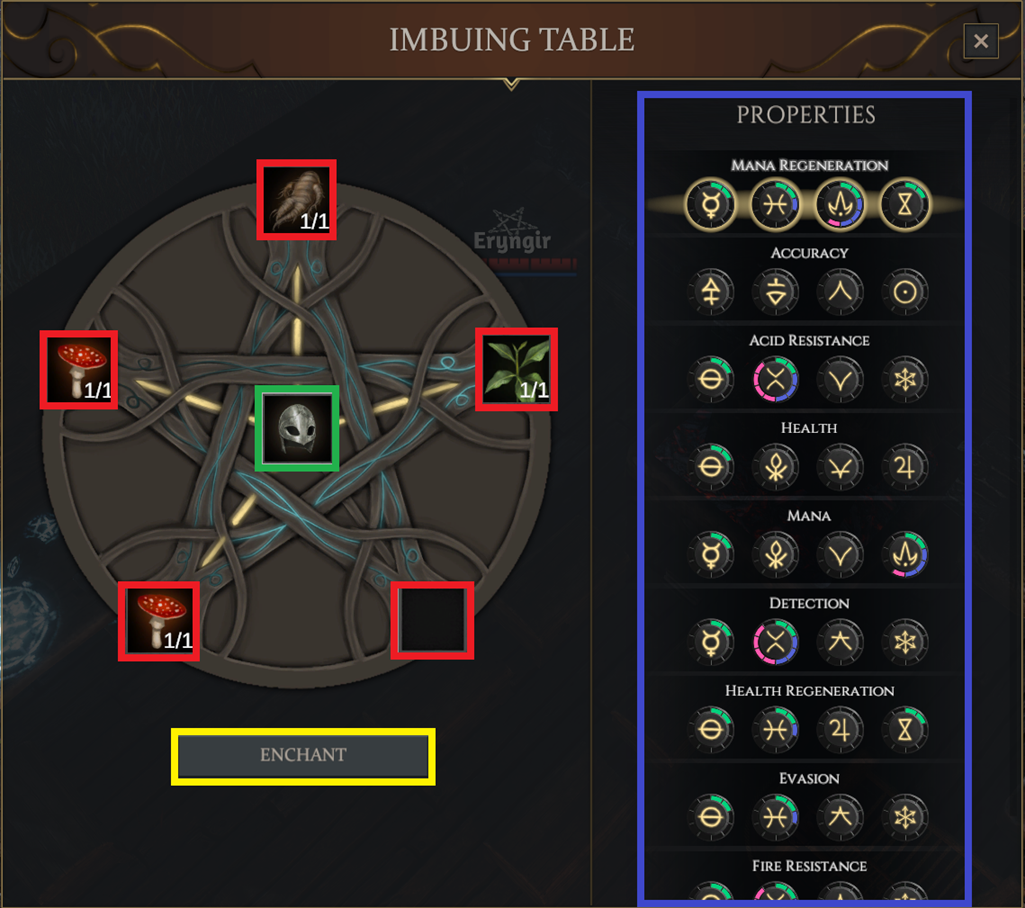
To imbue, place any equipment (helmet, body armor, gloves, shoes, necklace, any weapon or shield) into the center (Green Box). You will now see possible imbuements on the right side (Blue Box) - scroll down to see more.
Each imbuement requires 4 attributes listed underneath the imbuement name. Mouse over to see the names.
Each reagent (imbuement ingredient) has three aspects listed in their tooltip. To place the imbuement you want onto the equipment in the table, you need to place reagents in the outer squares (Red Boxes) and match the imbuement aspects with at least 2 points.Mana Regeneration requires Mind, Transfer, Time and Energy. Placing Mandrake Root, Bitterleaf and (2) Amanita Mushrooms into the imbuing table gives us:
Mandrake Root
We need the Transfer and Energy.
Bitterleaf
We need the Mind. Since we already have reached more than 2 Energy, we won’t need the additional Energy from the Bitterleaf.
Amanita Mushroom
We need the Time.
We now have at least 2 in Mind, Transfer, Time and Energy and the imbuement now shows available (Blue Box) for placing onto the equipment. Click on “Enchant” (Yellow Box)) and you are done. If multiple Imbuements show available, there is an equal chance to get one of them imbued onto your equipment.
You can find reagent combinations for different imbuements at FracturedBase
For a more detailed guide, have a look at the Imbuing guide by Ser Medieval
.
-
Enchanting
You can improve your items’ basic attributes like armor value or damage by going to a Enchanting Stone. Place your desired item into the open slot and click on “enchant” to increase your enchanting level by 1. You will need to spend gold and primal crystal residue/dust for each level with higher levels requiring more.All items start at enchanting level 0 and can reach a maximum of level 4.
-
FAQ
Read the official FAQ
Q: The imbuement table doesn’t work!
A: Make sure you own or have permissions for the enchanting table you are using. The public one in the starter and tutorial town does not work. Make sure you have ingredients and equipment placed matching the wanted enchantment attributes. Read the guide above for more info.Q: Is the bank in town global?
A: No, it is town specific. You will not be able to access your bank chest from Town A in town B.Q: How do I build a house?
A: You need 2000 gold, find an unoccupied place on the map, purchase the land and place the blueprint. For more detail, read the building section in this guideQ: Are all parcels 4x4 in size?
A: All parcels in the open world are 4x4, only guild cities can offer 5x5 parcels.
-
good job, keep it up!
-
This is great! Thanks!
-
Nice guide, thank you for taking the time.
-
good job man
")
-
Really nice! Thank you.
-
@Silynx Very nice and helpful thread!
I've stickied it to make it more visible.
-
GREAT post!
-
Very nice tutorial!
Can I add one more question for your FAQ?
Q: Am I immune to player (or animal) attacks while resting at campsite, meddling with my skills presets?
-
Super nice guide @Silynx
Maybe add it to the Wiki, that would be surely helpful to have it there too, at least as a link to the forum.